Yes/No
Use
The Yes/No control displays a Boolean attribute for the end user to select between Yes and No options.
Related to Attribute Types
This control is related to Boolean attributes.
Properties
Every control has a set of properties that allow customization of its behavior in the Work Portal. However, some properties are exclusive to specific controls. The following properties are exclusive to the Yes/No control:
Basic Tab
| PROPERTY | DESCRIPTION |
|---|---|
| Display as | Defines how the control will be visually displayed. • Option: Displays two options, Yes and No. Only one option can be selected. • Checkbox: Displays a checkbox. If checked, the control value will be "Yes"; otherwise, it will be "null". |
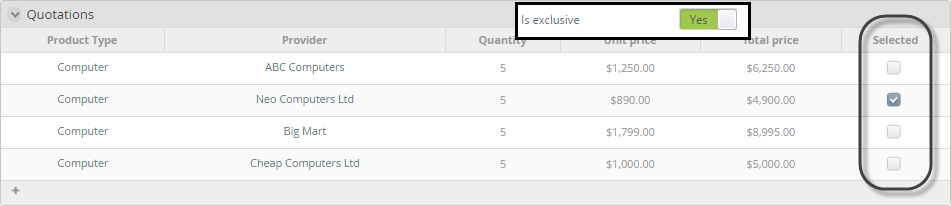
| Is exclusive | This property applies when the control is included as a table column and the property Display as is Checkbox. When enabled, all the checkboxes displayed in the table are mutually exclusive, meaning only one box can be selected. Use expressions with validations instead of setting the control as required. When Display as is Checkbox, the isNull function works like isFalse. |
| Note | Exclusive boolean controls within a table cannot be used as controls within actions and validations. |
Display as Example

Is Exclusive Example
Advanced Tab
| PROPERTY | DESCRIPTION |
|---|---|
| Default Value | Automatically sets a value when the form opens for the first time. Once a value is chosen by the user, the default will be replaced. If the associated attribute is valued by means of an expression, the default value is ignored. |
| Submit on change | This property is deprecated. We suggest using Actions and Validations. When enabled, as the end user selects a value from the control, the entire form refreshes and executes all Actions, Validations, and visibility rules. |
| Note | Clicking the Set to default value icon will reset the properties. |
Example
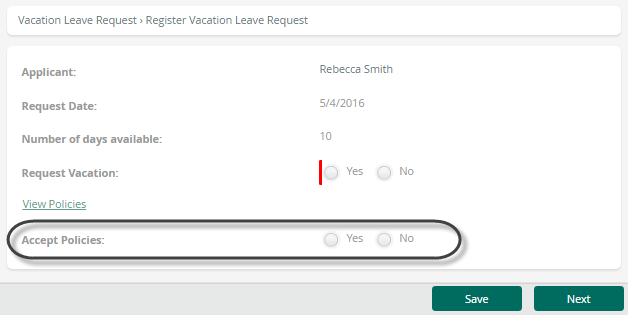
In a Vacation Request Process, when an employee requests vacations, they must read and accept the company's vacation policies. To allow the user to accept or reject these policies, a Yes/No control must be inserted onto the Request form.
-
Create a Boolean attribute in your Data Model:
Create an attribute namedAccept policiesin the Process Entity.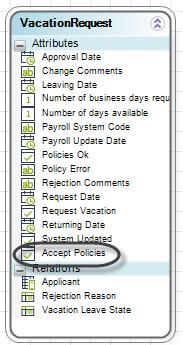
-
Drag and drop the Accept Policies attribute from the data model onto the Display area:
The attribute is automatically interpreted as a Yes/No control.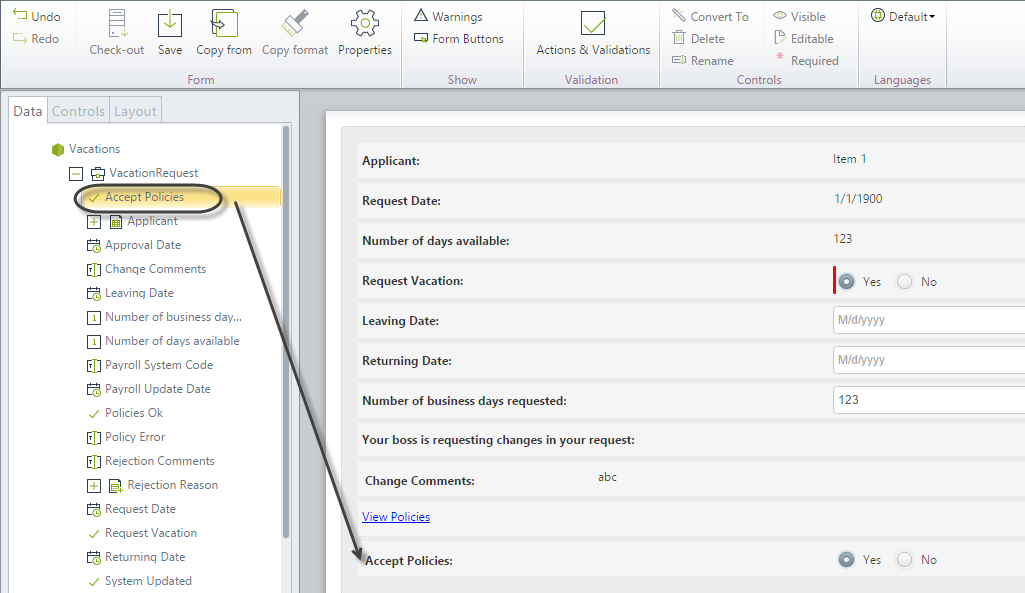
-
Save the Form and test in the Work Portal: